Deploy Laravel to Cloudways
Deploy Laravel to Cloudways
How to deploy your Laravel application to a live server. In this example I will be using Cloudways by Digital Ocean. The Laravel app I will be deploying is built with Jetstream and Inertia.js. This in depth guide will take you through the entire deployment process.
Deploying a Laravel app can be tricky at times. Things seem to be going smoothly and then suddenly everything falls apart. I know the feeling! Luckily, deploying a Laravel web app to Cloudways hosting is really easy. In this guide I will show you the exact steps you need to take to get your Laravel app live on Cloudways.

Deploy Laravel to Cloudways step-by-step Guide
In this guide I will go through step-by-step exactly what you need to do to deploy Laravel to Cloudways.
Step 1: Sign up to Cloudways
The first thing you need to do is create an account with Cloudways. This is easy to do and is a case of filling out your details and verifying your email address. Make sure you use code GOBLIN to get 20% off for 2 months if you decide to go onto a paid plan.
Step 2: Create server and application on Cloudways
Server creation
Once you have created your account, Cloudways will take you straight to the server creation page. You will be presented with options for your application and server details.
Select "Laravel" from the first select menu, then give names to your application, server and project. It doesn't matter what you name these so don't get bogged down trying to think of something clever. I named my server "Server 1". Original.

Select a hosting provider
You can now select your server. By default it is set to DigitalOcean. I personally have always used DigitalOcean and had good experiences using this option. If you want to use AWS or one of the other options it should work exactly the same - however I have not tested them so cannot confirm this.

Server size
You now need to select the size of your server. For production Laravel apps, Cloudways suggest you use at least a 4GB server. You can get away with lower and scale the size of your server at any time so don't worry if you want to start with a smaller one.

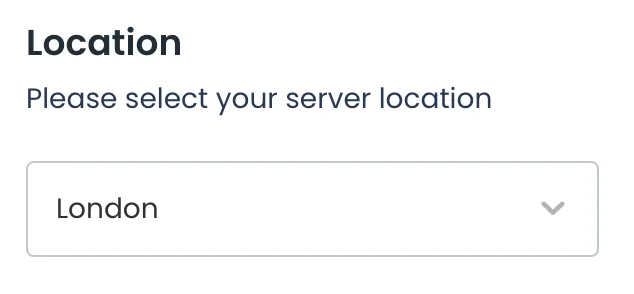
Server location
Select the server location that is nearest to where your users are located. This isn't the most important selection but in theory it should be slightly faster if its near where your app is being accessed from. Don't get bogged down with this.
Once you have set all of these options you can click the "Launch Now" button and Cloudways will start setting up your server! This will take a few minutes, so be patient.
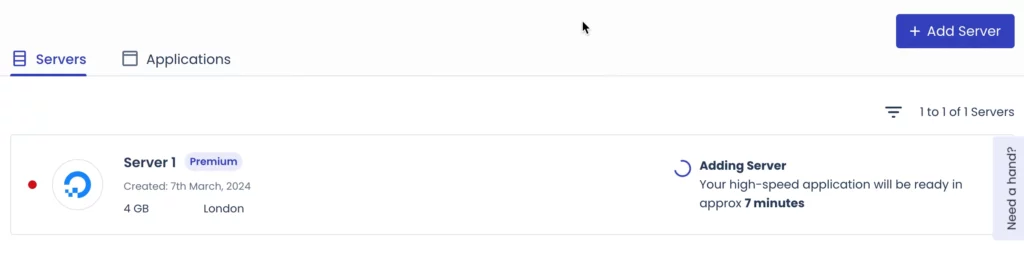
Your Cloudways server will take a few minutes to set up
Step 3: Add Laravel project to Github
We will be deploying our Laravel application to Cloudways via Git. So in order to do this we need to add our Laravel app to Github. The exact git commands you need to use vary depending on the version of git you have running on your machine. For full reference you can checkout these github docs.
Create local Git repository
We need to create a local git repository. In the terminal, navigate to the root of your Laravel project. Check your Git version so you know which commands to run. Run the relevant command to initialise a new local repository
Git 2.28.0 or later version
git init -b main
Git 2.27.1 or earlier version
git init && git symbolic-ref HEAD refs/heads/main
Add project files to local repository
We have now initialised an empty git repository. So we need to add the files from our Laravel app. Run the following commands in the route of your Laravel app.
git add .
git commit -m "First commit"
Create remote repository on Github
We now need to create a remote repository on Github and push our local repository to it. Run the following command in the root of your Laravel project.
gh repo create
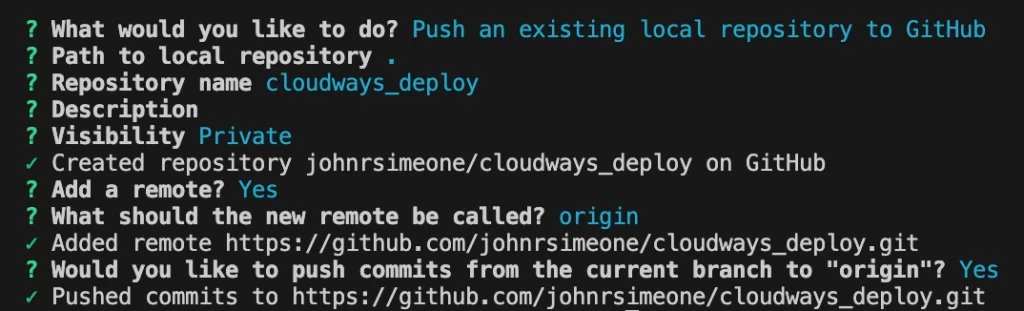
Running this command will present you with a series of options in the terminal. These are the options you want to select:
- What would you like to do? Push an existing local repository to Github
- Path to local repository .
- Repository name Leave blank to use your existing project name, use different name if you want to
- Description Optionally add a description or just leave it blank
- Visibility Up to you but I personally make this Private
- Repository name Leave blank to use your existing project name, use different name if you want to
- Add a remote? Yes
- What should the new remote be called? Leave blank to use default (origin)
- Would you like to push commits from the current branch to "origin"? Yes
Now if you go to your Github account and view the repositories page, you will see this newly created repository. And all the code from your local repo will be in there! Great stuff.
Step 4: Turn off caching in Cloudways
Caching is useful. However when in development it can make you want to pull your hair out. For this reason I recommend you deactivate it whilst deploying your Laravel project on Cloudways.
Navigate to your newly created application. Then go to application settings. In the "General" tab, scroll down to the section labelled "Varnish". Disable Varnish.

Step 5: Deployment via Git
We are making good progress. Now head to the "Deployment via GIT" tab in the left hand menu of your application settings on Cloudways. Now take the following steps:
- Generate SSH Keys
We need to generate SSH keys to allow our Cloudways server to communicate with our Github repository. Click the "Generate SSH Keys" button. This will (surprisingly) generate our SSH keys.
- Copy SSH Keys
Once our SSH keys have been generated. Click the "View SSH Keys" button. This will display the key, we need to now COPY this key. Click the copy icon in the top right of the modal to easily do this.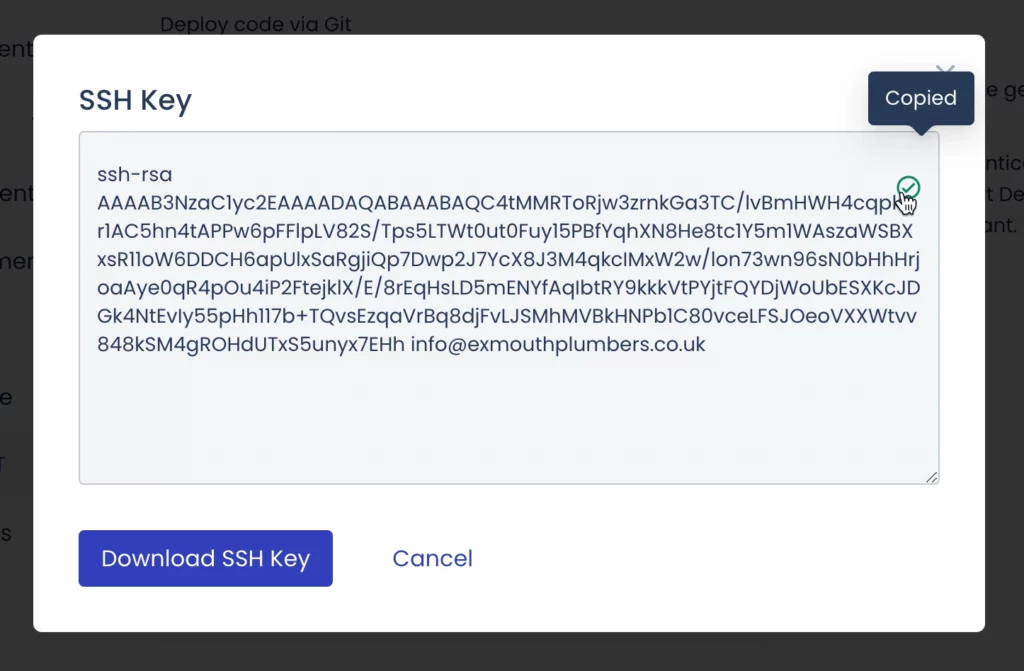
- Paste SSH keys into Github project
Now we need to head back to our Github repository. Click "Settings". Navigate to the "Deploy keys" tab - this can be found in the left hand menu under Security. Now click "Add deploy key". Paste your SSH key into the Key field. Give your key a title in the Title field (it doesn't matter what you call this). Leave the "Allow write access" box unchecked. Now click the "Add key" button.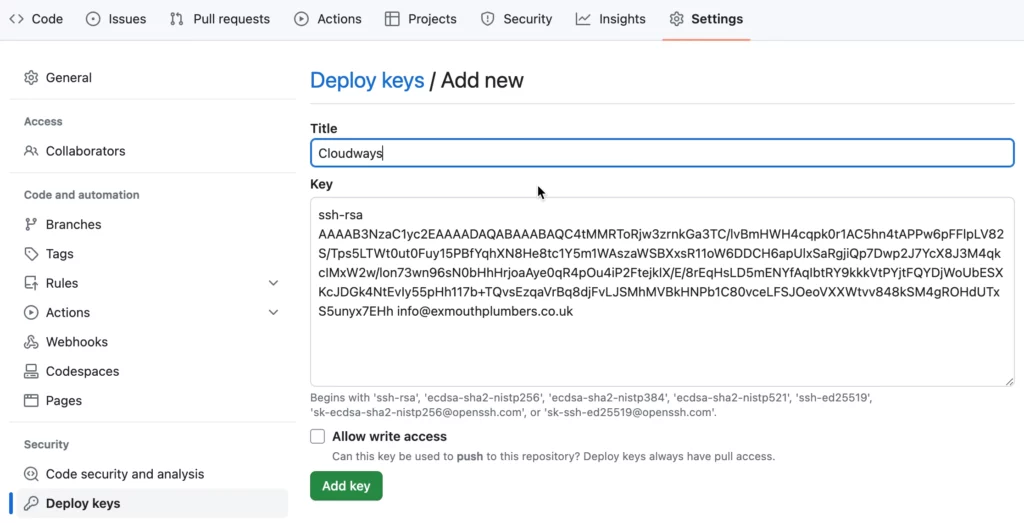
- Copy Github repository SSH address
In our Github repository, click the green "<> Code" dropdown button. Click the "SSH" tab and copy the address that appears.
- Link Cloudways to Github
Head back to your Cloudways application and paste the address into the GIT Remote Address field. Click "Authenticate". select "main" from the Branch dropdown menu. Leave the Deployment Path as it is (public_html/). Click "Start Deployment"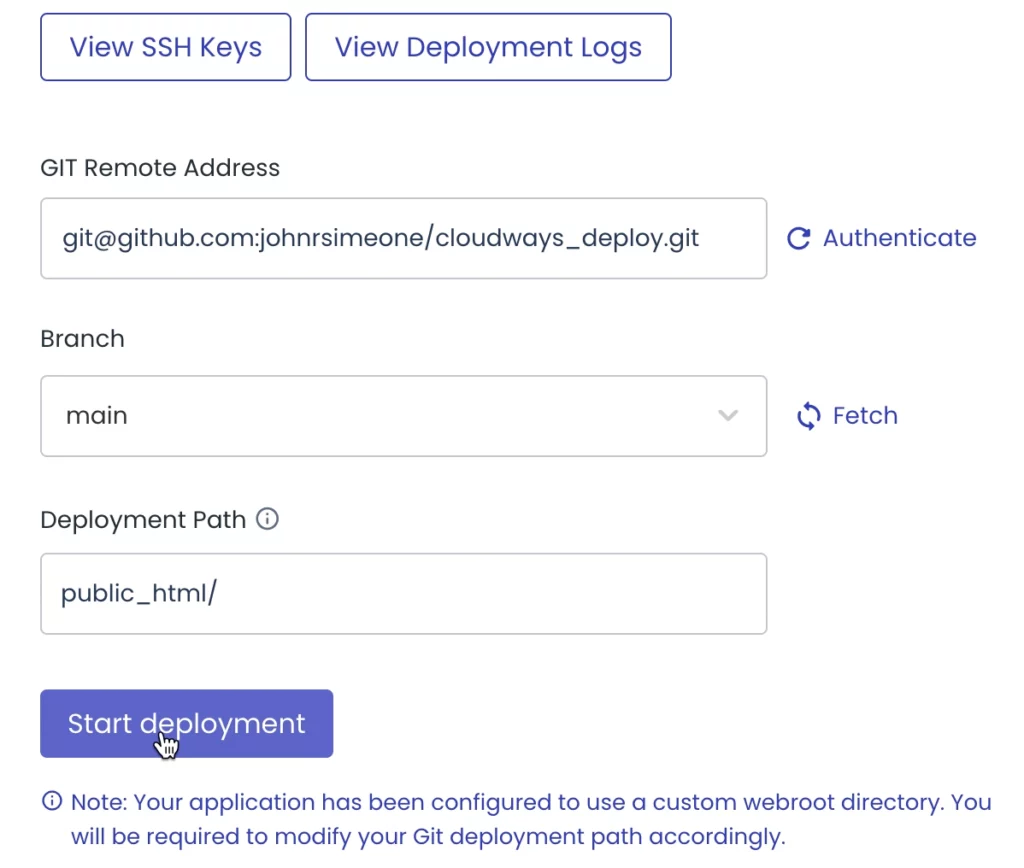
Authenticate Github repository and fetch main branch before starting deployment
If you have followed these steps correctly your Laravel application will be cloned from your Github repository into your Cloudways server.
Step 6: Set up composer and npm
We need to access our server via the terminal in order to run a couple of commands. Don't worry, this is easy to do and I will give you exact steps so you don't mess this up.
Log in to SSH terminal
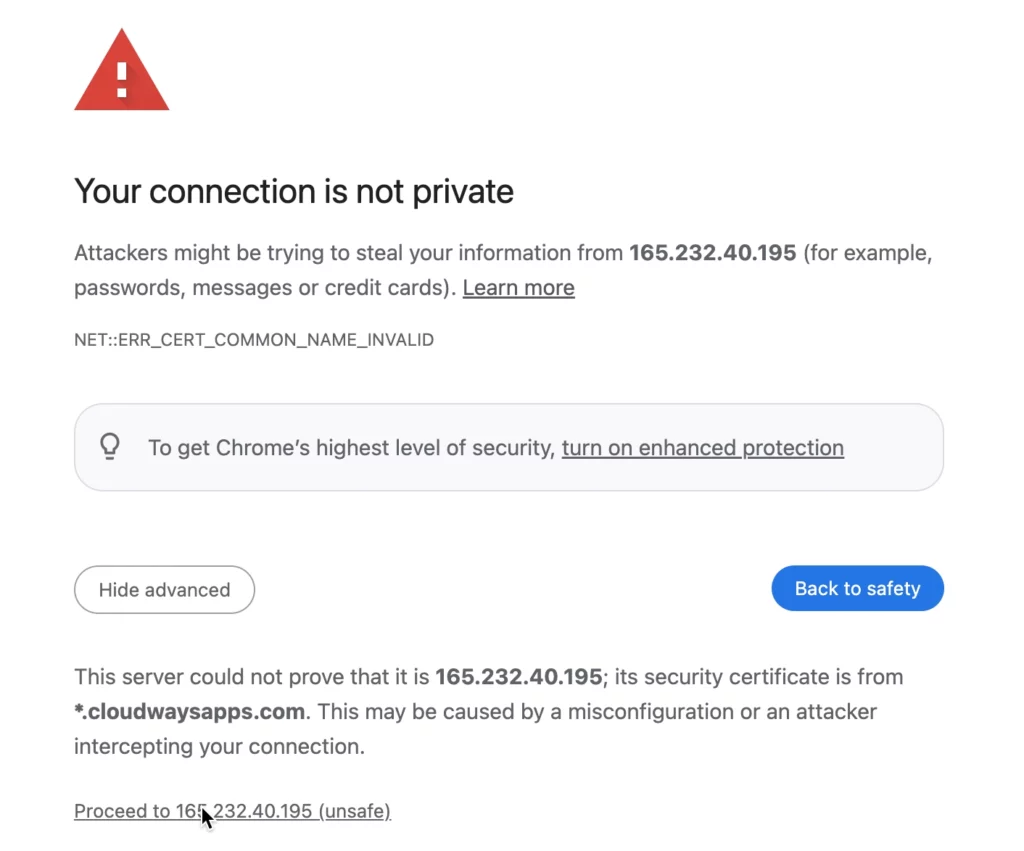
Head to the server in Cloudways. Once in your server settings, head to the "Master Credentials" tab. Now click "Launch SSH Terminal", this will open the terminal in a new tab. If you are using Chrome you will probably get a warning saying that "Your connection is not private". If you get this message, click "Advanced" then click the "proceed to xxx.xxx.xx.xxx (unsafe)" link. Now use the username and password from the "Master Credentials" page to login to the SSH terminal.
Navigate to our public_html directory
Now you have logged into your SSH terminal, we want to navigate to to the "public_html/" directory as this is where our Laravel project files are. The following commands will help you to do this:
ls
cd

If you are struggling with this, watch this part of my video guide as it shows exactly how to use the commands.
Commands to run
Once you are in the "public_html/" directory we need to run the following commands:
composer update
composer install
npm update
npm install
npm run build
I'm assuming that you haven't uploaded your build files to your Github repository. If you have done this, you do not need to run npm run build in your server's SSH terminal.
Step 7: Update .env file on Cloudways
We are nearly there. We need to make some changes to the .env file that is in our Laravel application on our Cloudways server. You should never push the .env file from your local repository to your remote Github repository. By default git will exclude this file in the .gitignore file that is created when you initialised the local git repository. There will be a different .env file on your server. We need to access this.
Access .env via SFTP
Head back to our application settings in Cloudways. We need to go to the "Access Details" tab in the left hand menu. Scroll down and click "Add SFTP User". Create a user with a username and password. Now you will need to SFTP into your server using an FTP client such as FileZilla.

- Host: sftp:// */
- Username: Username for SFTP user you just created in Cloudways
- Password: Password for SFTP user you just created in Cloudways
- Port: You can leave this blank
Once you have successfully connected to your server via SFTP, navigate to the "public_html" directory. In this directory you will find the .env file. We need to edit this file. In FileZilla right click the .env file and click "View/Edit". This should open the file for us to edit!

Database connection settings in .env
The environment variables we are interested in are those relating to the database connection. On the "Access Details" tab in our Cloudways application we will find the details we need. Copy the DB Name, Username and Password and paste them into the corresponding .env variables: DB_DATABASE, DB_USERNAME and DB_PASSWORD. Save the changes made to the .env file and upload them to the server. Overwriting the previous version of the .env file.

Step 8: Run the database migration
We are nearly there. We just need to run our database migrations. Head back to the SSH terminal on our Cloudways server. Once again, make sure you are in the "public_html/" directory. Run the following command:
php artisan migrate
All of our database tables should now have been migrated.

We are now at a point where we should be able to see our live application. Go back to the "Access Details" tab in cloudways. You will see an "Application URL" link, click this link and you will be able to see your live application!

Congratulations! Your Laravel web application is live. What a great feeling. Now any time you want to update your live app - all you need to do is push your changes to your git repo, then pull them into Cloudways. Make sure you clear the cache after doing this to avoid displaying the old version of the app.
Try out Cloudways for free. No card required! Use code GOBLIN for 20% off for 2 months.